Showing posts with label CUIT blog. Show all posts

Tuesday, 20 January 2015

Why does application close after each test in Coded UI Test


In Coded UI, a flag CloseOnPlaybackCleanup is added to ApplicationUnderTest class. 
For cases where an application is launched during test run, this flag helps determine whether to close the application under test after test is over.  Default value for the flag was set to true (closes the application) as it is not advisable to re-use resources from other test cases. 
This works fine for Visual Studio 2012 and later versions. Users will see  BrowserWindow / ApplicationUnderTest is getting closed after each test case if they don't have CloseOnPlaybackCleanup flag set to false. 
 If you want to reuse any application instance launched in another test case, you have to assign CloseOnPlaybackCleanup flag to false for ApplicationUnderTest / BrowserWindow object.
Please refer to sample code as below. If you run all these three tests together, BrowserWindow will be launched only once, remaining other tests will use existing browser instance from the previous test. If you run each test individually, then each test case will close the browser at the end of the run.

public class CodedUITest1
    {
        public CodedUITest1()
        {
        }

        [TestMethod]
        public void CodedUITestMethod1()
        {
           LoadLocalHost();
        }

        [TestMethod]
        public void CodedUITestMethod2()
        {
            LoadLocalHost();
        }

        [TestMethod]
        public void CodedUITestMethod3()
        {
            LoadLocalHost();
        }


        static BrowserWindow browserWindowInstance = null;

        public void LoadLocalHost()
        {
            if (browserWindowInstance == null)
            {
                browserWindowInstance = BrowserWindow.Launch(new System.Uri("http://google.com/"));
                browserWindowInstance.CloseOnPlaybackCleanup = false;
                browserWindowInstance.Maximized = !browserWindowInstance.Maximized;
            }
            else
            {
                browserWindowInstance.Maximized = !browserWindowInstance.Maximized;
            }
        }
}     

The same principle is applied with running tests using Command Line. If you are running tests altogether, the Application Under test will remain open in between tests in case CloseOnPlaybackCleanup is set to false. Once the run is over, all application instances which were launched during the run are closed.

Searching a UI Test Control with an invalid property


What if we give an invalid property as the Search/Filter property

For Web technology,
  • If an invalid SearchProperty is used to Find a UITestControl, it will throw UITestControlNotFoundException. 
e.g:- If you searched for the search edit box in google.com using a InvalidSearchProperty,
this.mUISearchEdit.SearchProperties["InvalidSearchProperty"] = "foo-bar";
you would get the UITestControlNotFoundException

  • If an invalid FilterProperty is used to Find a UITestControl, it will be ignored.
e.g:- If you searched for the search edit box in google.com using a InvalidFilterProperty,
this.mUISearchEdit.FilterProperties["InvalidFilterProperty"] = "foo-bar";
you would succeed in locating the edit box and performing operations performed on it.

For MSAA & UIA technologies,
  • If an invalid SearchProperty is used to Find a UITestControl, it will throw an ArgumentException
e.g:- If you searched for the button ‘6’ in the calculator using a InvalidSearchProperty
this.mUIItem6Button.SearchProperties["InvalidSearchProperty"] = "foo-bar";
you would get the following exception.
System.ArgumentException: The property InvalidSearchProperty is not a valid search property.
  • FilterProperties are not supported. If you specify FilterProperties for a WinForms or WPF control,  you will get the following message.
System.ArgumentException: Filter properties are not supported by the following technology: MSAA. To search for a control, you must remove the filter properties.
NOTE also for all technologies,
  • If an invalid Property is used in GetProperty/SetProperty, it will throw a NotSupportedException.

Monday, 19 January 2015

How to add all controls on a page to the UIMap


This blog says how to add all controls on a page to the UI Map. This can be done with the following code.
Here I am adding all controls on the bing start page to the specified ui test file.

First create a UITest object from a file(i.e. empty UITest file).
You can add an empty UI Test file to your Test Project by right clicking on the Test Project and choosing Add –> New Item –> Coded UI Test Map.
UITest uiTest = UITest.Create(uiTestFileName);

The below 3 lines create a new UIMap object and adds it to UITest object
Microsoft.VisualStudio.TestTools.UITest.Common.UIMap.UIMap newMap = new Microsoft.VisualStudio.TestTools.UITest.Common.UIMap.UIMap();
newMap.Id = "UIMap";
uiTest.Maps.Add(newMap);

Now launch the browser, navigates to google.com and passes a reference to the browser & the UIMap object to GetAllChildren method. 
GetAllChildren(BrowserWindow.Launch(new Uri("http://bing.com")), uiTest.Maps[0];);
GetAllChildren is a method which recursively gets the children of the browser object and adds them to the UIMap.

The whole code

public void AddControlsToUIMap()
        {
string uiTestFileName = @"<LOCATION>\TestProject\UIMap.uitest";
UITest uiTest = UITest.Create(uiTestFileName);
Microsoft.VisualStudio.TestTools.UITest.Common.UIMap.UIMap newMap = new Microsoft.VisualStudio.TestTools.UITest.Common.UIMap.UIMap();
newMap.Id = "UIMap";
uiTest.Maps.Add(newMap);

GetAllChildren(BrowserWindow.Launch(new Uri("http://google.com/")), uiTest.Maps[0];);
             uiTest.Save(uiTestFileName);
        }

private void GetAllChildren(UITestControl uiTestControl, Microsoft.VisualStudio.TestTools.UITest.Common.UIMap.UIMap map)
        {
foreach (UITestControl child in uiTestControl.GetChildren())
            {
                map.AddUIObject((IUITechnologyElement)child.GetProperty(UITestControl.PropertyNames.UITechnologyElement));
                GetAllChildren(child, map);
            }
        }

You can now customize the code based on your need. 

If you wanted to add the Childrens of specific type, instead of GetChildren, you can use FindMatchingControls

Wednesday, 17 December 2014

How to schedule Microsoft coded UI test execution without microsoft TFS

  1. Create a release of stable coded UI project by following steps
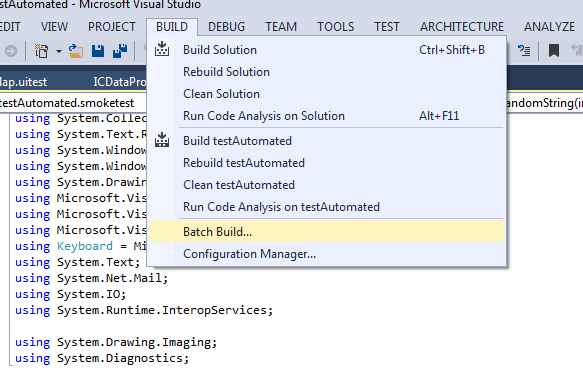
  1. Open  Build > Batch build
  1. Click rebuild if a release was already built


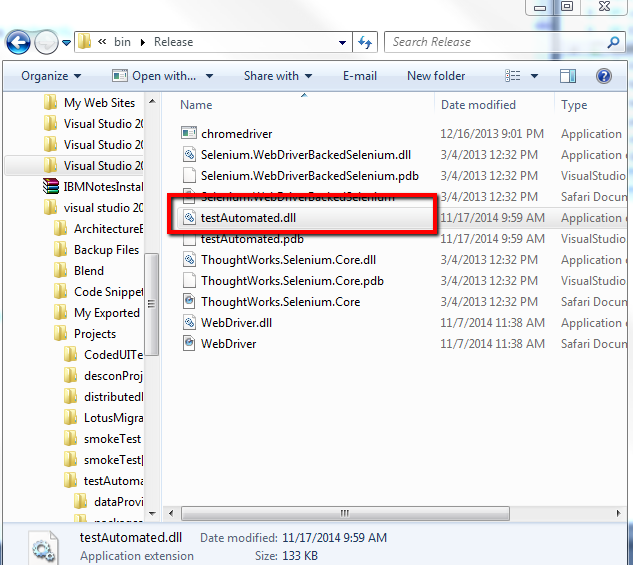
  1. After successfully building coded UI project navigate to release folder of project and copy testAutomated.dll named with your project name
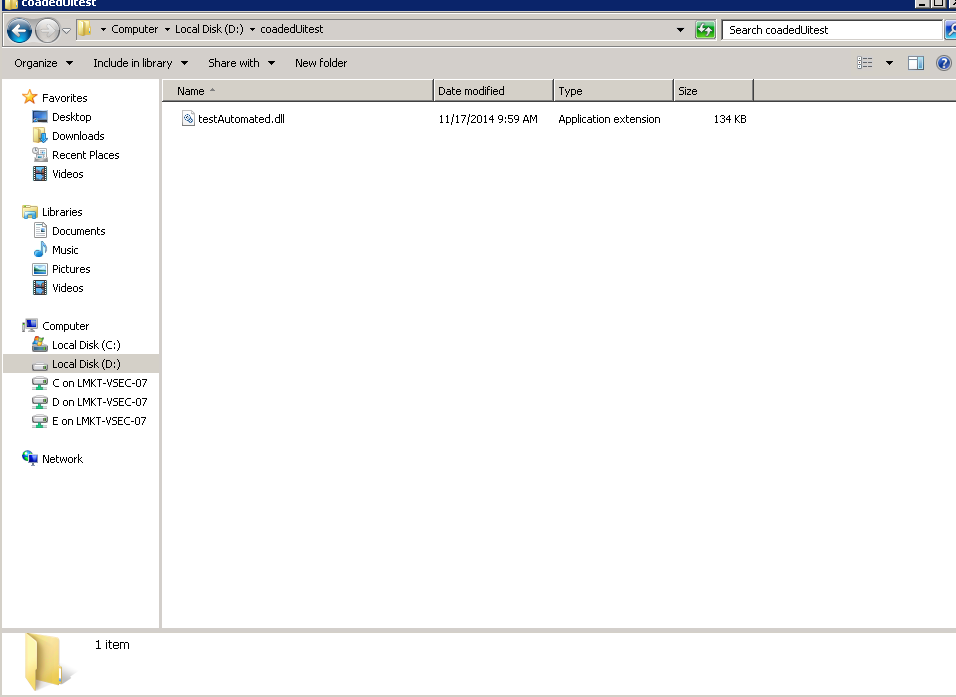
  1. Place this dll on remote machine where you want to schedule your test execution
  1. Place .dll in some directory of remote machine e.g I am placing in D:\coadedUitest


  1. Install Miscosoft Test agent from this link on this machine where you want to execute test . http://www.microsoft.com/en-us/download/details.aspx?id=38186
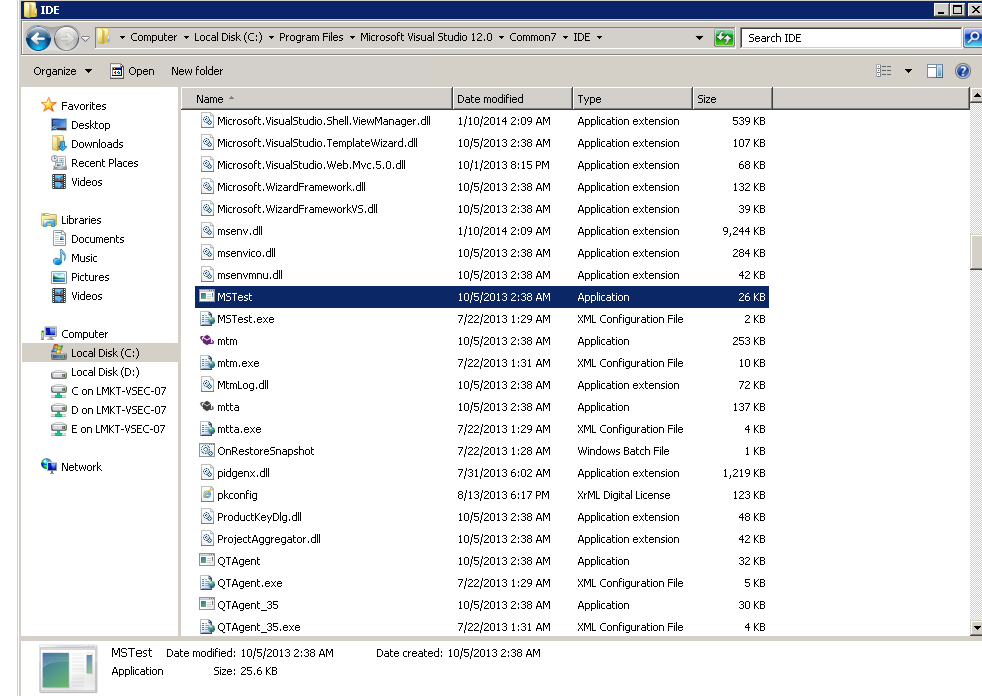
  1. After installing test agent verify MS test is present in location  
  1. Open note pad and enter following text
D:
cd coadedUitest
set mstestPath="C:\Program Files\Microsoft Visual Studio 12.0\Common7\IDE"
%mstestpath%\mstest /testcontainer:testAutomated.dll  


8. Save it with .bat extension


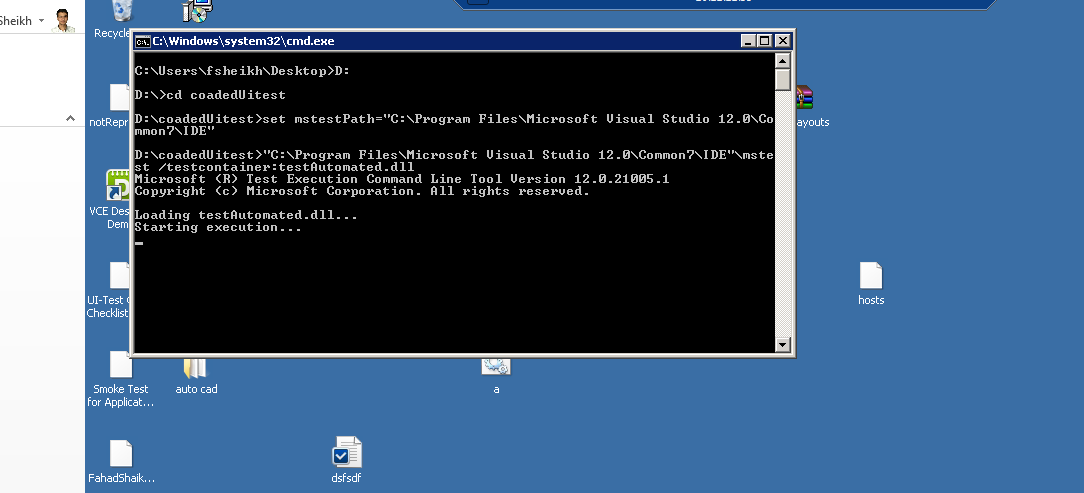
  1. Open .bat file by double clicking it to verify tests are executed or not
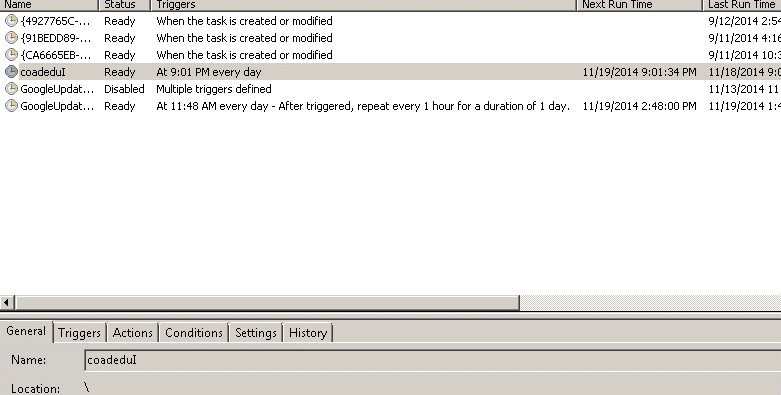
  1. After successful execution open windows task scheduler and create a scheduled task to run this created .bat file.

    Monday, 10 November 2014

    Search Configurations for the control in CodedUI


    Apart from the control specific properties, some other properties may be required to identify the control, e.g., if the control is nameless or the parent has to be expended before looking for a control e.g, tree item. Following are some of those.

    Search configuration of the control


    We have some predefined search configuration which helps to narrow down the search space (search only in visible controls) or to do perform some prerequisite before actually starting the search (expand parent tree node before searching for the child node). Following are the different search configs:

    SearchConfig ParameterDescription
    AlwaysSearchUITest uses a cache while doing actions on an Application by adding Always Search in the search config user can force UITest to not to use the cached value for the control.
    DisambiguateSearchIf the parent and the controls properties are same there are chances that UITest would start doing action on the parent itself. This config can be used to ask the playback to act on its child rather than the parent itself.
    ExpandWhileSearchingExpand the control before looking for the other control inside it. E.g., TreeView
    NextSiblingSearch in the siblings inside the container. Sometime if the control is nameless we may iterate from the named control inside the same container to reach the control.
    VisibleOnlySearch only in the visible control. It helps to reduce the search space.

    Sunday, 21 September 2014

    Windows 8, Win+I key combination

    In Windows 8, Win+I key combination is used to bring up the Settings Charms.

    So in Visual Studio 11 Coded UI Test, we now use Ctrl+I to locate controls. 
    NOTE: This shortcut key and its behavior is present only Coded UI Test Builder is in “Add Assertions” mode.
    Also NOTE: The change is applicable for Visual Studio 11 on all Operating systems. (not just Win8)

    You can modify this key combination now in Coded UI Test Builder.exe.config

    (%ProgramFiles%\Microsoft Visual studio11.0\Common7\IDE\CodedUITestBuilder.exe.config)

    In the appSettings section, add the following keys. (Replace with Modifier & Key that you want)
    <add key="FetchModifierKey" value="Control"/>
    <add key="FetchKey" value="I"/>

    Data Driven Coded UI Tests

    After you have created a coded UI test, you can use the steps in the following procedure to add your data source and parameters to your test. This example assumes that you have these code elements in your solution:
    • A coded UI test class named CodedUITest1.
    • A test method named CodedUITestMethod1().
    The test method is for a simple calculator application that adds two numbers and verifies that they are added together correctly for this test to pass.
    The data source is a .csv file that contains the following data:
    Input1
    Input2
    ExpectedResult
    3
    4
    7
    5
    6
    11
    6
    8
    14
    Create the file and add it to your test project.
    1. After adding the data, the file should appear as the following:
      Populate the .CSV file with data
    2. It is important to save the .csv file using the correct encoding. On the FILE menu, choose Advanced Save Options and choose Unicode (UTF-8 without signature) – Codepage 65001 as the encoding.
    3. The .csv file, must be copied to the output directory, or the test can’t run. Use the Properties window to copy it.
      Deploy the .CSV file
      Now that we have the data set created, let’s bind the data to the test.

    Create a Data-Driven Coded UI Test

    To create a data-driven coded UI test

    1. To bind the data source, add a DataSource attribute within the existing [TestMethod] attribute that is immediately above the test method.


      [DataSource("Microsoft.VisualStudio.TestTools.DataSource.CSV", "|DataDirectory|\\data.csv", "data#csv", DataAccessMethod.Sequential), DeploymentItem("data.csv"), TestMethod]  
      public void CodedUITestMethod1()  
      {  
      
          // To generate code for this test, select "Generate Code for Coded UI Test" from the shortcut menu and select one of the menu items.  
          this.UIMap.AddNumbers(); 
      
      } 
    2. The data source is now available for you to use in this test method
    3. In Solution Explorer, open the CodedUITest1.cs file. Make the following changes to the CodedUITestMethod1() method:

    4. Add the following two lines of code before the call to the AddTwoNumbers method to provide values for the numbers to add.
      this.UIMap.AddTwoNumbersParams.TextInput1EditText = 
          TestContext.DataRow["Input1"].ToString();
      this.UIMap.AddTwoNumbersParams.TextInput2EditText = 
          TestContext.DataRow["Input2"].ToString();
      
    5. Add the following line of code before the call to the AssertforAdd method to provide the value for the assert method.
      this.UIMap.AssertforAddExpectedValues.TextAnswerEditText = 
          TestContext.DataRow["ExpectedResult"].ToString();
      
      This is how the coded UI test method should look with the parameters and the data source added to it:
      [DeploymentItem("DataDriven.csv"), 
          DataSource("Microsoft.VisualStudio.TestTools.DataSource.CSV", 
              "|DataDirectory|\\DataDriven.csv", "DataDriven#csv", 
              DataAccessMethod.Sequential), 
          TestMethod]
      public void CodedUITestMethod1()
      {
          // To generate code for this test, select "Generate Code for 
          // Coded UI Test" from the shortcut menu and select one of 
          // the menu items.
          this.UIMap.AddTwoNumbersParams.TextInput1EditText = 
              TestContext.DataRow["Input1"].ToString();
          this.UIMap.AddTwoNumbersParams.TextInput2EditText = 
              TestContext.DataRow["Input2"].ToString();
          this.UIMap.AddTwoNumbers();
      
          this.UIMap.AssertforAddExpectedValues.TextAnswerEditText = 
              TestContext.DataRow["ExpectedResult"].ToString();
          this.UIMap.AssertforAdd();
      }


    6. Save the changes to the CodedUITest1.cs source code file.
    7. To run your coded UI test, right-click the coded UI test in the Test View window and click Run Selection.
      After the tests have run, the overall test result for all iterations of the test displays in the Test Results window. To see the details of each iteration, double-click the test in the Test Results window.

    Monday, 1 September 2014

    Mouse hovers in CodedUI

    Manually recording mouse hovers
    Under some circumstances, a particular control that’s being used in a coded UI test might require you to use the keyboard to manually record mouse hover events. For example, when you test a Windows Form or a Windows Presentation Foundation (WPF) application, there might be custom code. Or, there might be special behavior defined for hovering over a control, such as a tree node expanding when a user hovers over it. To test circumstances like these, you have to manually notify the Coded UI Test Builder that you are hovering over the control by pressing predefined keyboard keys.
    When you perform your coded UI test, hover over the control. Then press and hold Ctrl, while you press and hold the Shift and R keys on your keyboard. Release the keys. A mouse hover event is recorded by the Coded UT Test Builder.
    CodedUI_Hover
    After you generate the test method, code similar to the following example will be added to the UIMap.Desinger.cs file:
    // Mouse hover '1' label at (87, 9)
    Mouse.Hover(uIItem1Text, new Point(87, 9));
    Configuring mouse hover keyboard assignments
    If necessary, the default keyboard assignment of Ctrl+Shift+R that is used to apply mouse hovering events in your coded UI tests can be configured to use different keys.
    To change the keyboard assignments, you must modify the following configuration file:
    <drive letter:>\Program Files (x86)\Microsoft Visual Studio 11.0\Common7\IDE\CodedUITestBuilder.exe.config
    In the configuration file, change the values for the HoverKeyModifier and HoverKey keys to modify the keyboard assignments:
    <!-- Begin : Background Recorder Settings -->
    <!-- HoverKey to use. -->
    <add key="HoverKeyModifier" value="Control, Shift"/>
    <add key="HoverKey" value="R"/>
    If having issues with recording mouse hovers on a website, then here Is the fix
    Setting implicit mouse hovers for the web browser
    In many websites, when you hover over a particular control, it expands to show additional details. Generally, these look like menus in desktop applications. Because this is a common pattern, coded UI tests enable implicit hovers for Web browsing. For example, if you record hovers in Internet Explorer, an event is fired. These events can lead to redundant hovers getting recorded. Because of this, implicit hovers are recorded with ContinueOnError set to true in the UI test configuration file. This allows playback to continue if a hover event fails.
    To enable the recording of implicit hovers in a Web browser, open the configuration file:
    <drive letter:>\Program Files (x86)\Microsoft Visual Studio 11.0\Common7\IDE\CodedUITestBuilder.exe.config
    Verify that the configuration file has the key RecordImplicitiHovers set to a to a value of true as shown in the following sample:
    <!--Use this to enable/disable recording of implicit hovers.-->
    <add key="RecordImplicitHover" value="true"/>

    Thursday, 21 August 2014

    How to send "Win + R" in C#


    using System.Runtime.InteropServices;
    using System.Windows.Forms;

    static class KeyboardSend
    {
        [DllImport("user32.dll")]
        private static extern void keybd_event(byte bVk, byte bScan, int dwFlags, int dwExtraInfo);

        private const int KEYEVENTF_EXTENDEDKEY = 1;
        private const int KEYEVENTF_KEYUP = 2;

        public static void KeyDown(Keys vKey)
        {
            keybd_event((byte)vKey, 0, KEYEVENTF_EXTENDEDKEY, 0);
        }

        public static void KeyUp(Keys vKey)
        {
            keybd_event((byte)vKey, 0, KEYEVENTF_EXTENDEDKEY | KEYEVENTF_KEYUP, 0);
        }
    }


    Then use the below to press Win+R

    KeyboardSend.KeyDown(Keys.LWin);
    KeyboardSend.KeyDown(Keys.R);
    KeyboardSend.KeyUp(Keys.R);
    KeyboardSend.KeyUp(Keys.LWin);

    Tuesday, 22 July 2014

    Mapping a network drive in C#


                string path = @"\\IPADDRESS /user:DOMAIN\USERNAME PASSWORD";
                // Z is the name given to the mapped network drive
                string strMapDrive = "/C net use Z: " + path;
                string strUnMapDrive = "/C net use Z: /delete";
                if (Directory.Exists("Z:\\"))
                {
                    System.Diagnostics.Process process = new System.Diagnostics.Process();
                    System.Diagnostics.ProcessStartInfo startInfo = new System.Diagnostics.ProcessStartInfo();
                    startInfo.WindowStyle = System.Diagnostics.ProcessWindowStyle.Hidden;
                    startInfo.FileName = "cmd.exe";
                    startInfo.Arguments = strUnMapDrive;
                    process.StartInfo = startInfo;
                    process.Start();
                    startInfo.Arguments = strMapDrive;
                    process.StartInfo = startInfo;
                    process.Start();
                }

    Monday, 14 July 2014

    Easy way to provide the Search and Filter properties

    If suppose there is a link and the following are the search and filter properties


    SearchProperties[HtmlEdit.PropertyNames.Id] = "value"; 
    SearchProperties[HtmlEdit.PropertyNames.Name] = "value"; 
    FilterProperties[HtmlEdit.PropertyNames.LabeledBy] = null; 
    FilterProperties[HtmlEdit.PropertyNames.Type] = "SINGLELINE/null"; 
    FilterProperties[HtmlEdit.PropertyNames.Title] = null/value; 
    FilterProperties[HtmlEdit.PropertyNames.Class] = "values/null"; 
    FilterProperties[HtmlEdit.PropertyNames.ControlDefinition] = "values"; 
    FilterProperties[HtmlEdit.PropertyNames.TagInstance] = "33"; 


    Instead you can give those properties in one line as below

    parentUIControl.SearchFor<HtmlEdit>( 
    new { Id = "s", Name = "s" } , new { LabeledBy = null, Type = "SINGLELINE/null", Title = null / value, Class = "values/null", ControlDefinition = "values", TagInstance = "33"}    ); 

    Sunday, 13 July 2014

    Creating Ordered tests in CUIT

    Executing the automated test scripts in Batch. In CodedUI  we can create and execute the batch of Unit tests using Ordered test.

    To create ordered test please follow the below steps:

    1. Open CodedUI TestProject.
    2. Click on Test tab >> New test.


    3. Select Ordered Test 


    -- We can give name to ordered test in Test name text box and click on OK button.

    4.Then we need to select the unit test from list of available tests in the project.


    5. In the Left side pane we can see the available tests.Either by double click on individual test or by selecting test and then click on ">" button will add the test to the ordered test list.To remove the test from "selected tests"- select the test from "selected tests"  list click on "<".


    6.Now the very important point is to check the "continue after failure"checkbox.This ensures that if any test get failed during the ordered test execution, then the next test will be executed from the selected list.e.g In given example if "checkAddition.." test fails then the "CheckMultiplication.." will be executed. 


    7. Now click on Save icon to Save the ordered test.


    8. Now click on Run test and then results will be generated.
    To Execute ordered test click on Test >>Windows>>Test List Editor


    9. select the ordered test from the list and click on Run ordered test icon. OR by right click on the selected ordered test and select "Run checked tests"


    10. The result will be shown as below: